Introduction
We have a brilliant Electrics starter kit that is ideal for a VW Transporter owner to add Leisure Electrics into the cab area, keeping it self-contained with the seat base. For a full campervan setup, it could be tweaked to provide more circuits for a Fridge, Lights, etc., but for a DayVan with a coolbox or a Daily Driver that does double-duty as a Festival overnighter, it is ideal.
What you get
Here we have everything you need, including a quality AGM Battery, split-charge system, cables, voltmeter, 12V and USB Sockets, all ready to be fitted within the space of a Single Seat Base, nice and tidy and out the way!
You can choose between a quality VSR type system, using a Victron Cyrix-ct Battery Combiner, or the ultimate solution of a Victron Orion-Tr Smart B2B (Battery to Battery) Charger for best results.
Along with your chosen Victron unit, you get the Battery Watch system to keep an eye on both the Starter and Leisure batteries, a 110Ah AGM Battery that fits neatly within the T5 seat base, A Twin-Outlet USB Socket and a 12V Accessory Socket, and a Hoovies Drive/Camping Radio Switch Kit.
Along with the kit above, you get all the wiring required to install – pre-made with all connectors fitted ready to connect up, labelled up to match the provided wiring diagram (provided but not shown in this guide). We also provide both a mounting board to fit all the main components to and a replacement rear kick plate to fit the Battery Watch kit and USB & 12V Sockets to. In addition you get precisely made layout templates for the boards to position the various devices to make the cabling even easier.

Runthough of the Underseat Installation
The following is a series of photos that go through the installation of the Dayvan Kit. As mentioned, tweaking the components is very doable and can be done later on after installation if you change how you change your vans use, or we can modify the kit supplied to you, but we will show you the standard kit setup here.
Firstly, you take the board we provide. This is precut to match the interior of a T5 Single Seat Base, but needs a final adjustment (we don’t do that before sending as seat bases can vary slightly).
Tape the template in place and mark the notches in the bottom corners to cut. This is setup for a T5 drivers Seat Base. You can use the template to check if it needs any adjustment for your own base. If you have a swivel plate with a nut mounted under the plate you may need to have the mount slightly lower (a good way to do this would be to trim away some of the carpet under the seat base where the mount plate would rest.
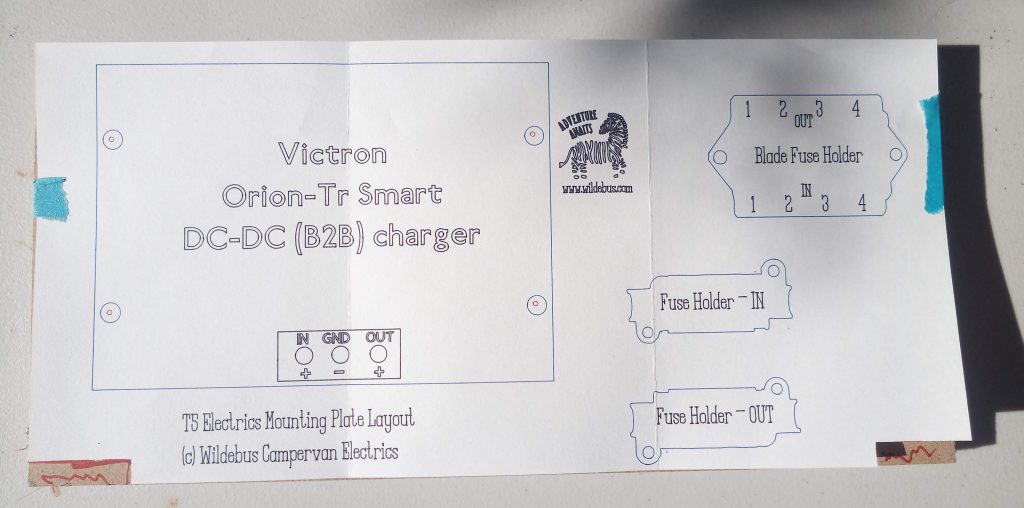
The above template is for an Installation of the Victron B2B Kit with a Battery that has the +VE fitted on the Near Side (left as you sit facing forward). The template you get will depend on what kit you buy and what battery you get (we can provide different batteries on request).
All the component positions are marked, even down to mounting holes to be marked and pre-drilled.
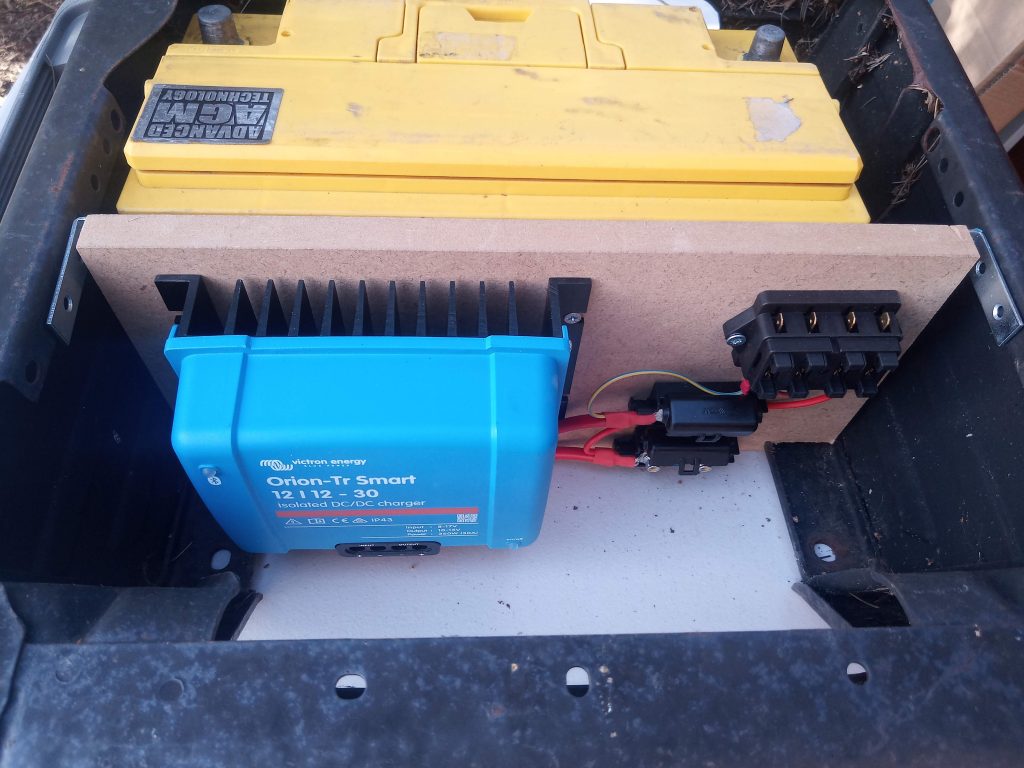
Note: The Victron B2B we usually supply is the ‘non-isolated’ version with a single ground (as per the template) rather than the ‘isolated’ version in these photos, so the wiring shown will assume that usual controller.
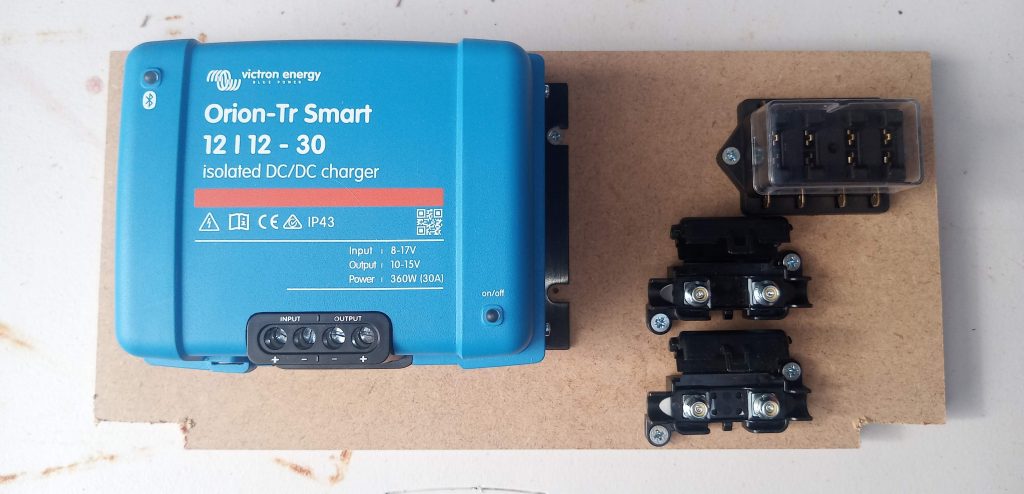
The cables provided are carefully sized and matched to the template
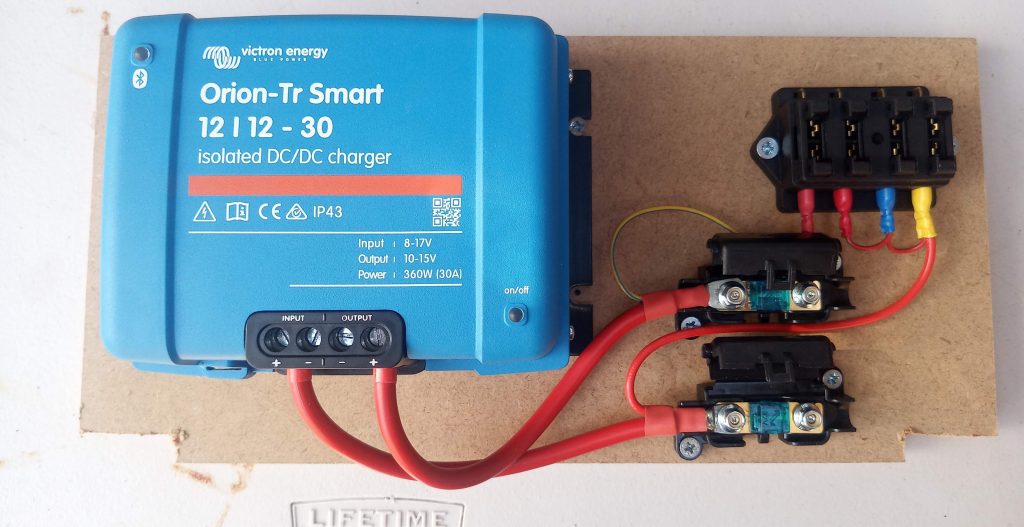
We would recommend the board be built and cabled up as shown above (for whichever template you have, of course), with the screw fixing holes drilled once confirmed to ensure it suits your setup.
Note that there could be a bunch of existing VW cables under the seat (especially on the passenger side) that will need shifting out the way (front left is favourite usually) . The cable from the starter battery will be routed under the carpet and pop up inside the seat base at the front.
This next photo shows all the wiring including to the Battery Watch and USB/12V sockets
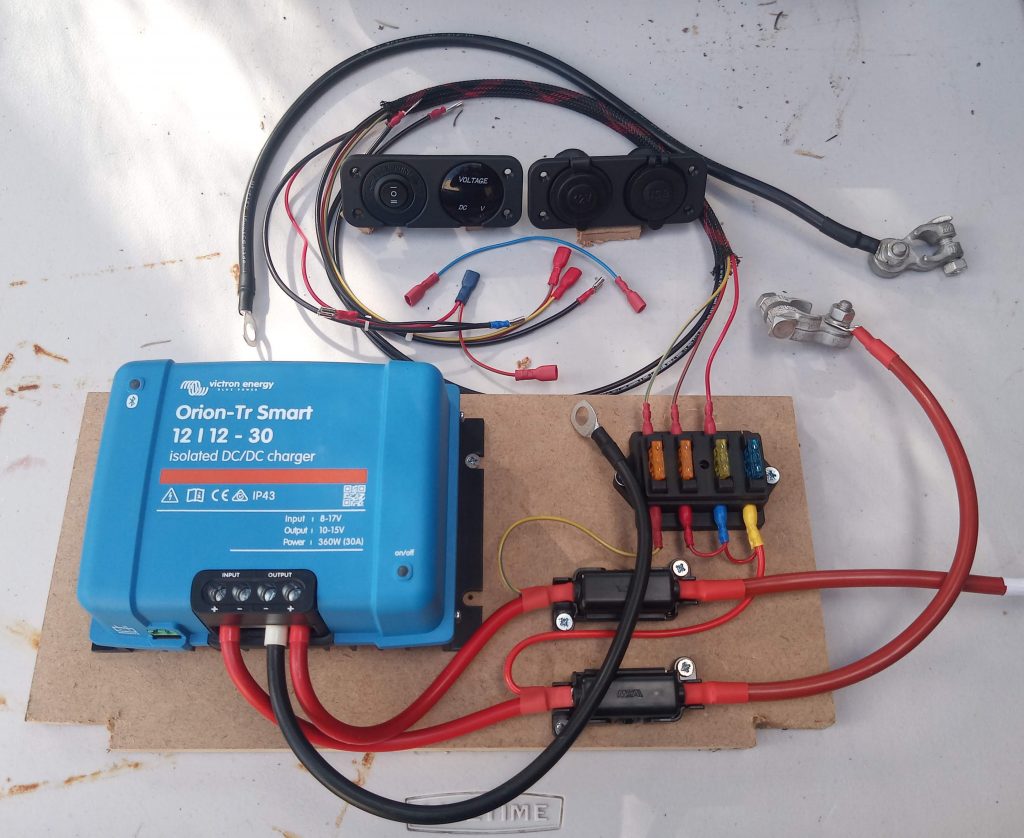
The only cables not fully shown is the 16mm cable going to the starter battery. This photo shows Battery Post Connections also – depending on the battery you may not need these ( The XR1750 battery we usually supply has screw-down terminals rather than posts and these give a better connection so you would not use the Posts. The device earth cables go to the special VW Earth stud in front of each seat base. the B2B and Battery earth/-ve cables get secured by using the seat base bolts that secure the base to the floor.
This is what you would see from the front when the mount is in place

The fuses are readily accessible for maintenance.
This is a top view before the accessory cables are fitted
Note that the battery in this photo is not the model that is in the kit – it is just one of the same length and width to work as a ‘dummy’. The actual battery supplied is a low-height battery that sits under the top of the seat base.
You also will notice the “L Brackets” at the top. These are supplied and should be fitted in the best postion to secure the board at the top (the seast base keeps the board in position at the bottom).
Photos of the seat kickplate will follow. This complete the installaton wiring and the final step would be to connect the +ve cable to the leisure battery and fit the fuse in the fuse holder in the engine bay by the starter battery (this holder is part of the kit).
The above series of photos show the B2B. Here is a quick shot of the Cyrix version setup for a battery having a +ve Connection on the offside.

A benefit of the VSR-type setup is the Cyrix is a lot smaller than the B2B as can be seen from the photo above. This layout allows the extra option of a small 2-way consumer unit (shown on the left) into which an RCBO/RCD can be fitted to provide a protected 240V hookup circuit and a 240V socket provided (this 240V kit is not part of the Combo kit, but can be provided as an extra kit).
A hookup kit can still be installed when using the B2B option of course, but the Consumer Unit just cannot be fitted to the provided board but can easily to fitted in front of the B2B.
If this has been of help, that is great! Please leave a comment if you found it useful or if you think this guide could be improved.